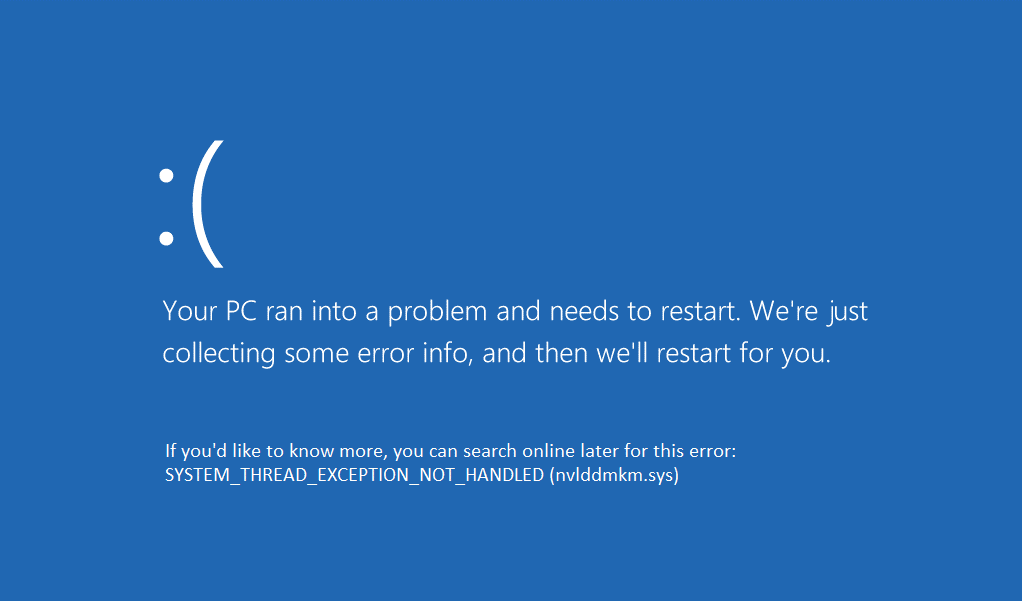
System Thread Exception Not Handled is a Blue Screen of Death or BSOD error that indicates that a system thread generated an exemption that the error handler didn’t catch. This error is usually due to faulty drivers. An outdated, corrupted, or incompatible driver may cause your system to display this error.
This may also be caused by system incompatibility, memory conflicts IRQ conflicts, overclocking softwares, etc. The immediate approach to this issue should be to uninstall a recently installed driver or program since it is not compatible with your system and is causing your system to show the BSOD.
When you see the Blue Screen of Death then it means that something is wrong with your PC. After you see the BSOD, your computer shutdowns and usually reboots itself. Depending on the severity of the error, the Windows will try to repair it but usually, this isn’t fixed until you do it manually.
Sometimes, you get stuck in a loop where after the Windows starts up, you will see the blue screen with the error message and stop code, and then the computer reboots. Then again the Windows starts up, the blue screen appears, reboot and this process repeats on and you’re stuck in a reboot loop.
If you are facing a similar situation then here are some fixes that you can try that will help you fix this issue:
Fix 1: Rollback / Uninstall Malfunctioning Drivers
You can skip the first step if you are able to log in to the Windows
Step 1: Booting into Safe Mode
When you get stuck in a reboot loop then you can’t access the Windows components and can’t make any required changes. A simple fix for this to just boot the Windows into the Safe Mode. In Safe Mode, you can make changes and uninstall any program/driver which may be causing this issue. Here is how you can boot into Safe Mode when you are stuck in a reboot loop:
- Open System Recovery by pressing F11 when the PC reboots.
- You will see a recovery menu with different options. Go to Troubleshoot > Advanced options > Startup Settings.
- Select Safe Mode or Safe Mode with Networking/Command Prompt to access Windows. (F5 for Safe Mode, F6 for Safe Mode with Networking, F7 for Safe Mode with Command Prompt)
- Once the PC boots in the Safe Mode, you have to identify the device or driver which is causing this error.
Step 2: Identifying the malfunctioning driver
To identify the malfunctioning driver here is what you should do:
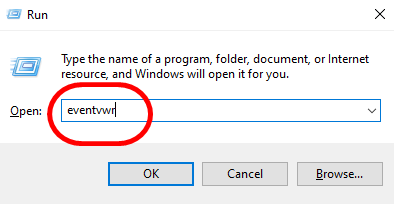
- Open the RUN box by pressing Windows + R keys.
- Type “eventvwr” and press Enter.
- Go to Windows Logs > System.
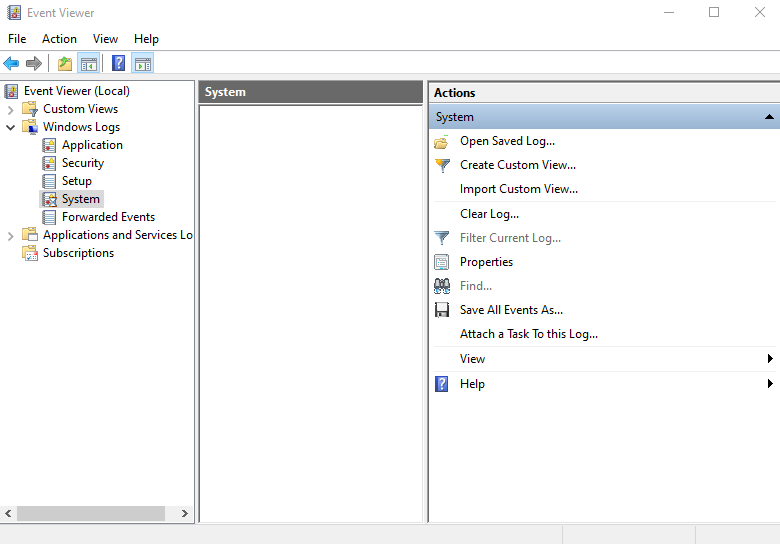
- Find the error log to see the related information.
You will see that the error SYSTEM_ THREAD_EXCEPTION_NOT_HANDLED is followed by atikmdag.sys, nvlddmkm.sys, nwifi.sys, or CMUDA.sys. This means that the mentioned driver is the culprit behind this error and you will have to either roll back the driver or reinstall it.
- Atikmdag.sys and nvlddmkm.sys are related to the display card.
- Nwifi.sys is a driver file related to the network card.
- CMUDA.sys is a driver file related to the USB Device Audio capacity.
Step 3: Rollback / Uninstall driver(s).
Once you identify the malfunctioning driver, you will have to either roll back the driver to its previous version which was compatible with Windows or uninstall and re-install it again. Here’s what you have to do:
- Go to Device Manager and select the malfunctioning Driver.
- Right-click on the driver and select Properties.
- Switch to the Driver tab.
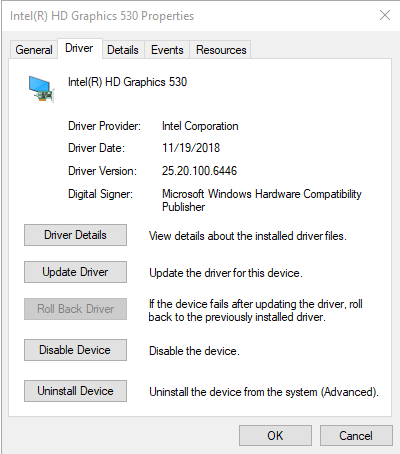
- To roll back, click on Roll Back Driver. Choose a reason and click Yes.
- To uninstall, click on Uninstall Device.
- Now, reinstall a compatible version of the driver.
Fix 2: Fixing Corrupted or Damaged Files
Sometimes the problem is not with drivers but rather with system files that are corrupted and could lead to this error. You can try and find out if there is any corrupted file(s) available and then try to fix them.
Using CHKDSK
CHKDSK is a built-in Windows tool that scans & analyzes hard drive errors and fixes the related file system errors.
To check for corrupted files on your system using CHKDSK, you should:
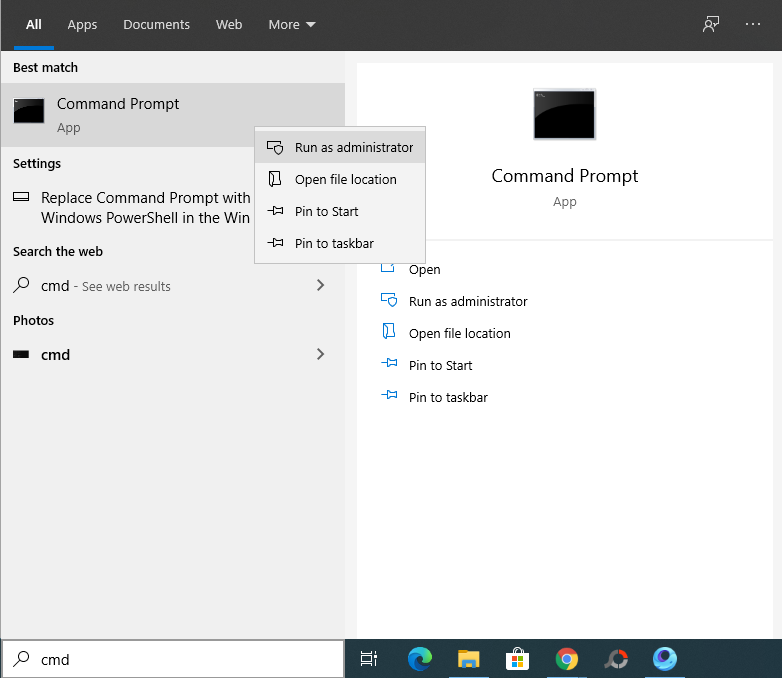
- In the Start menu search box, type cmd, or command prompt.
- Right-click on the command prompt search result and select Run as administrator.
- After the Command Prompt has opened, type CHKDSK C: /F /R and press Enter.
- In the next step, the command prompt will ask you to schedule a check disk next time you restart your PC. Type Y and press Enter.
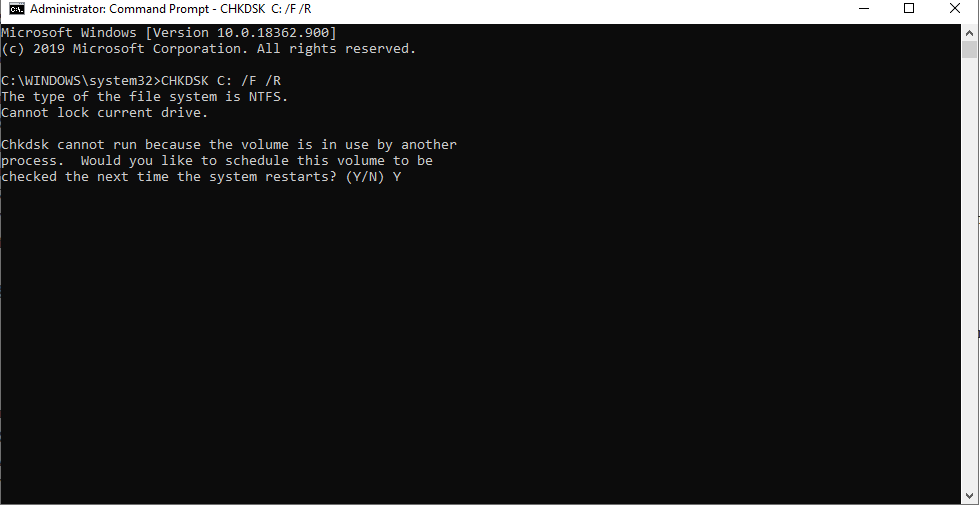
- Now, restart your PC.
- Your PC will boot up and after that, it will perform a full system scan to find any corrupted file. This process will take some time so, be patient and don’t turn off your PC during the process.
- If there are any corrupted files available then CHKDSK will try to fix those.
Using System File Checker
SFC or System File Checker is another Windows’ built-in utility that also scans and fixes Windows system files and resolves the issues that you were facing.
To run SFC on your PC:
- In the Start menu search box, type cmd, or command prompt.
- Right-click on the command prompt search result and select Run as administrator.
- After the Command Prompt has opened, type SFC /scannow and press Enter.
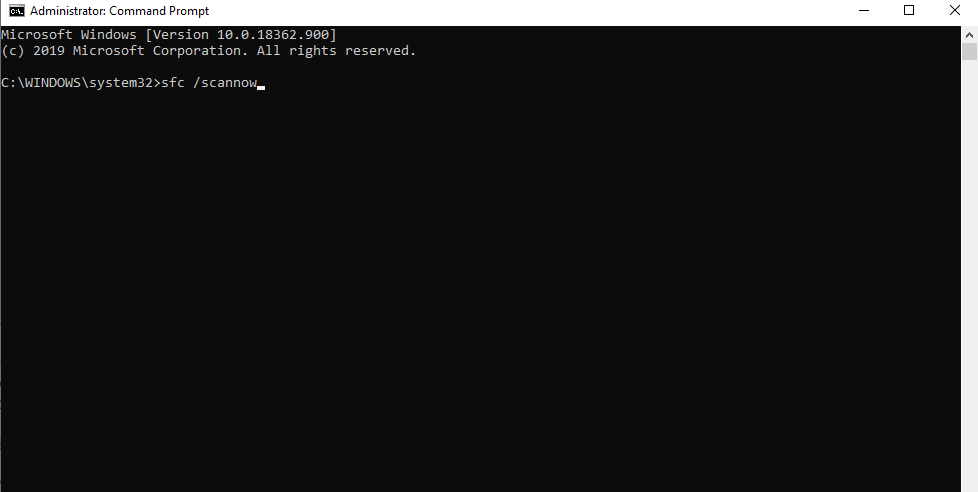
- The process will start. It will perform a scan and automatically fix any corrupted or damaged files on your PC.
Using DISM
DISM is also a system that can help you restore missing or damaged corrupted files. Where SFC just replaces damaged or lost system files, DISM restores system files and can also be used to fix such errors.
Here is how you can use the DISM tool:
- Open Command Prompt with admin privileges as mentioned above.
- In the Command Prompt window, type the following command; DISM.exe /Online /Cleanup-image /Restorehealth and press Enter.
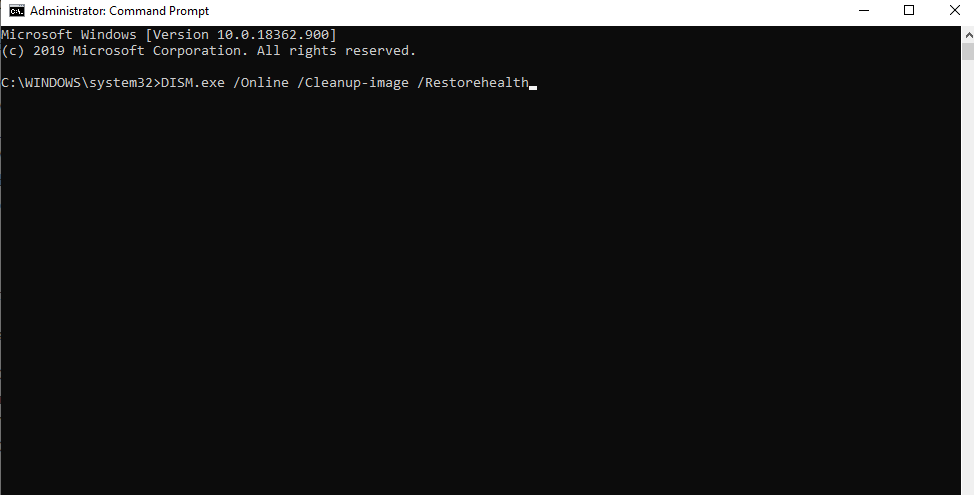
- The process may take some time, so be patient. After it completes, it will most likely fix your issue.
You can read more about SFC and DISM here.
Fix 3: Reinstalling Windows
In case none of the aforementioned fixes worked, you can try reinstalling Windows to solve this issue. Performing a clean reinstallation of Windows fixes all the issues.