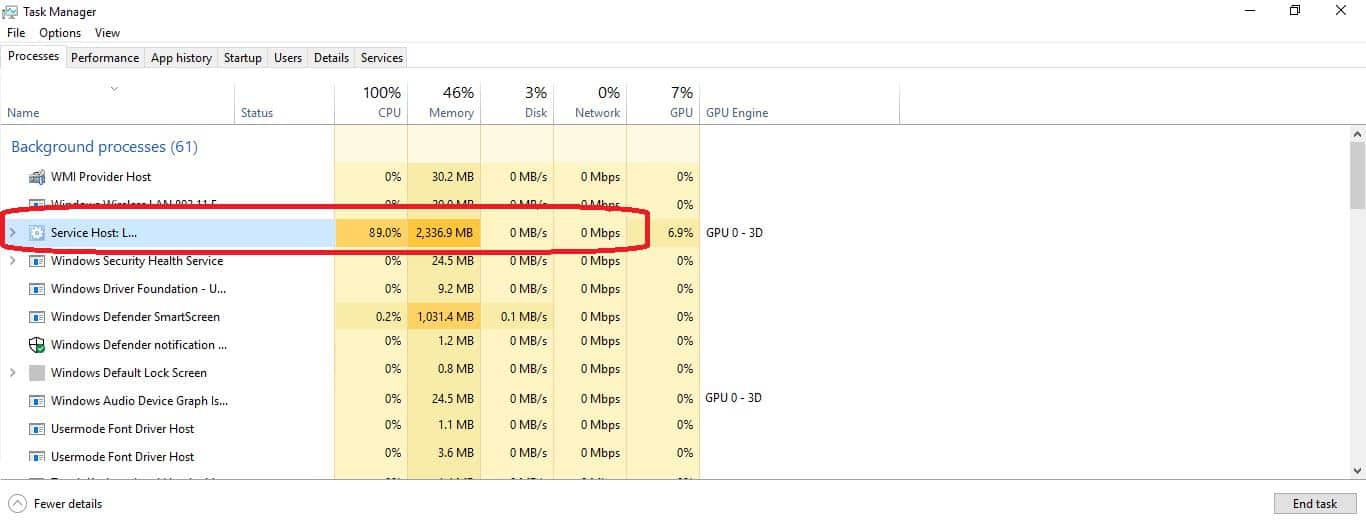
Svchost.exe is a built-in Windows process that is required for the proper functioning of Windows operations. This process is an important one as it loads up other required services for optimal Windows functionality. However, this process has been reported by users to be consuming a hefty amount of system resources without any reason.
The problem does exist with Svchost.exe and it starts consuming system resources even when your PC is idle and you aren’t doing anything. There are different reasons why that happens but the common one includes when your PC is infected by a virus or when you recently updated your Windows or by a full Event log file or any other program or service may cause Svchost.exe to drain your system resources.
Here is how you can fix this problem and get rid of high CPU/Disk usage for no reason:
Fix 1: Scanning PC for viruses
If your PC is infected by viruses or malware then you would be facing this issue. On a PC infected by viruses, you may find the Svchost.exe process to use up to 100% of system resources. Therefore, before you proceed to any further and try any other step, you should perform a full PC scan and rule out the possibility of viruses or malwares.
Fix 2: Disabling the services which are causing svchost.exe high CPU usage
As mentioned earlier, svchost.exe is required by many services and processes to run properly and some of these services/programs can cause it to use high system resources.
The quick and easy solution to this to find out which service(s) are being run under the svchost.exe process and then disable or uninstall that service to fix this problem.
Here is how you can do so:
Windows 7:
- Open Task Manager by pressing Ctrl + Alt + Del at the same time.
- Click on the Processes tab and select the svchost.exe process that is using too many system resources.
- Right-click on the process and select Go to service(s).
- It will automatically switch over to the Services tab and highlight the services that are being used under that particular svchost.exe process.
- Now, right-click on the service that is using the svchost.exe process and select Stop Service.
- This will disable that particular service and stop svchost.exe from consuming too many system resources.
Windows 8, 8.1, and Windows 10:
- Press Ctrl + Alt + Del and select Task Manager.
- Click on the Details tab.
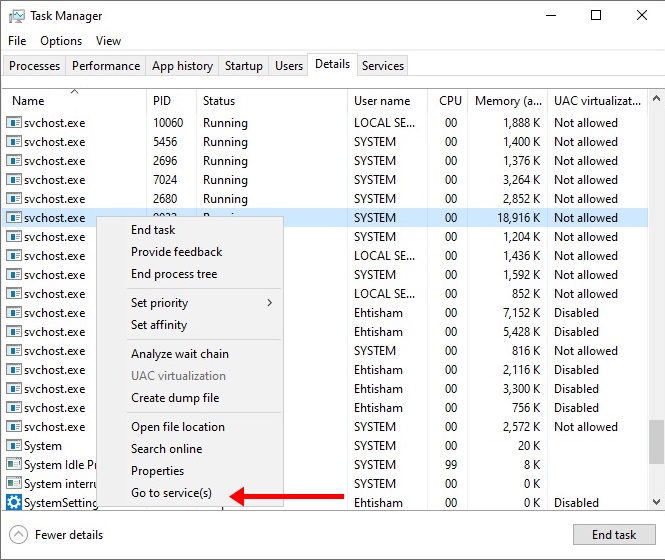
- Select the svchost.exe process that is using too many system resources and right-click on it and select Go to service(s).
- It will switch to the Services tab and highlight the service that is using the Svchost process.
- Right-click on the service and select Stop.
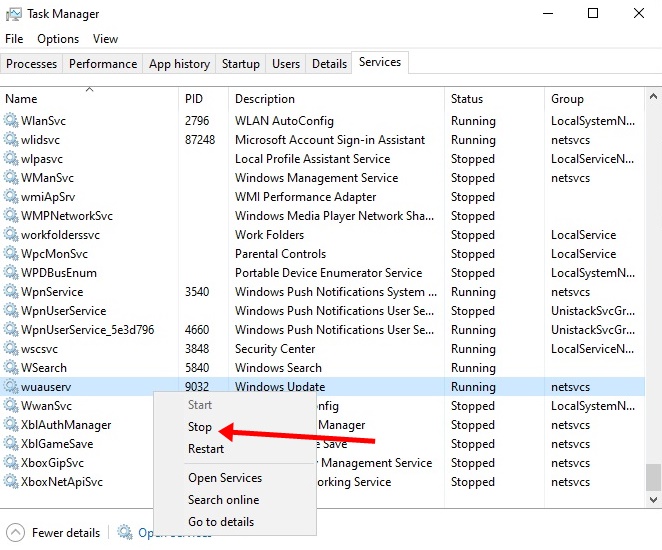
- The selected service will be stopped.
Now, that you have found out which service/program is using svchost.exe to consume too many system resources, you can completely disable that service to prevent it from using any resources furthermore. To disable a service permanently, here is what you should do:
- Invoke the Run box by pressing Windows + R key.
- In the Run box, type services.msc and click OK.
- Now, scroll and navigate the service that you want to disable.
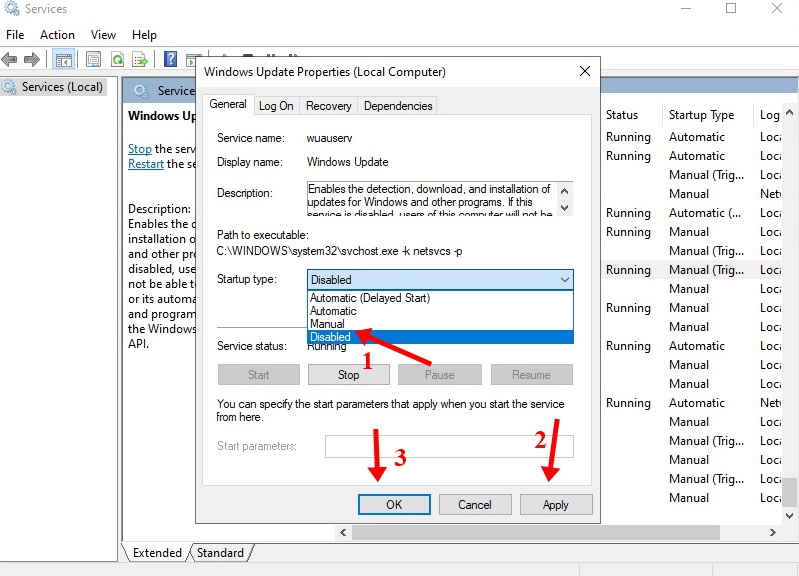
- Right-click on the service and select Properties.
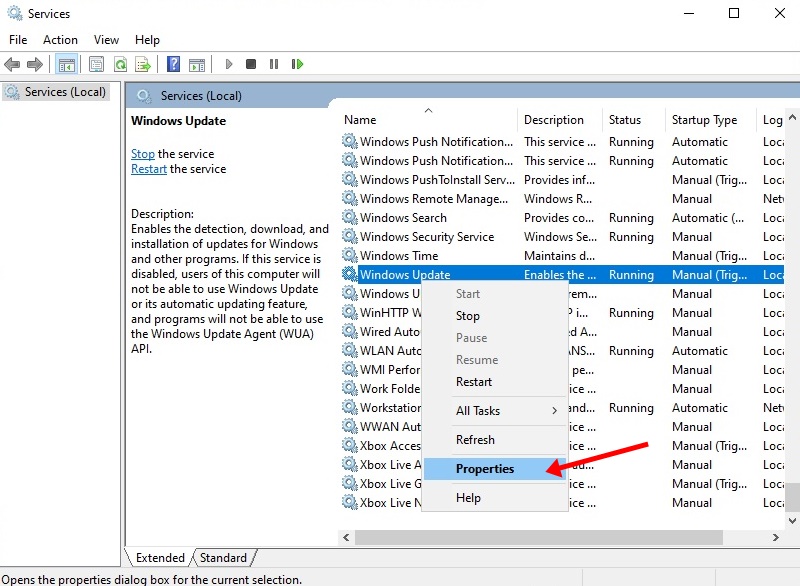
- Change the Startup type to Disabled and click Apply and then OK.
- Restart your PC and it will fix the problem.
Fix 3: Emptying the Event Viewer log
Sometimes, the problem is just caused by large log files in the Windows Event Viewer and the solution is to just clear the Event Viewer’s log. This fixes the problem and you needn’t do anything else. Here is how you can do so:
- Open the Run box by pressing Windows + R key.
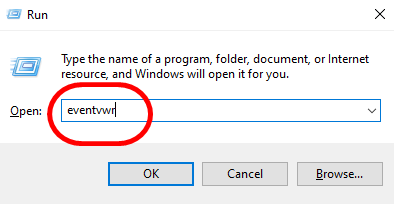
- In the Run box, type eventvwr and click OK.
- In the Event Viewer window, click on Windows Logs > Application.
- Right-click on Application and select Clear Log.

- Perform the same for Security, Setup, and System and clear the logs for these too.
- Restart your PC and see if the problem persists or not.
Fix 4: Troubleshooting Windows Update
The problem of svchost.exe using too many system resources is also caused by Windows Update service when it is searching for updates in the background or downloads the updates in the background. Here is how you can diagnose and fix this problem:
Delete the SoftwareDistribution Folder
SoftwareDistribution folder is the place where Windows stores the Windows Update files. If there is any corrupted file available then you will face this issue of Svchost.exe high CPU usage. The solution to this is to delete the previous folder and force the Windows to create a new one. To do that here is what you should do:
- Invoke the Run box by pressing Windows + R key.
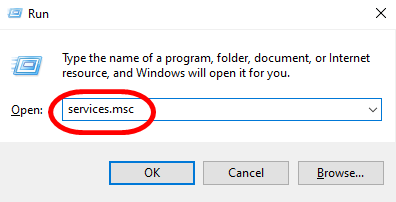
- In the Run box, type services.msc and click OK.
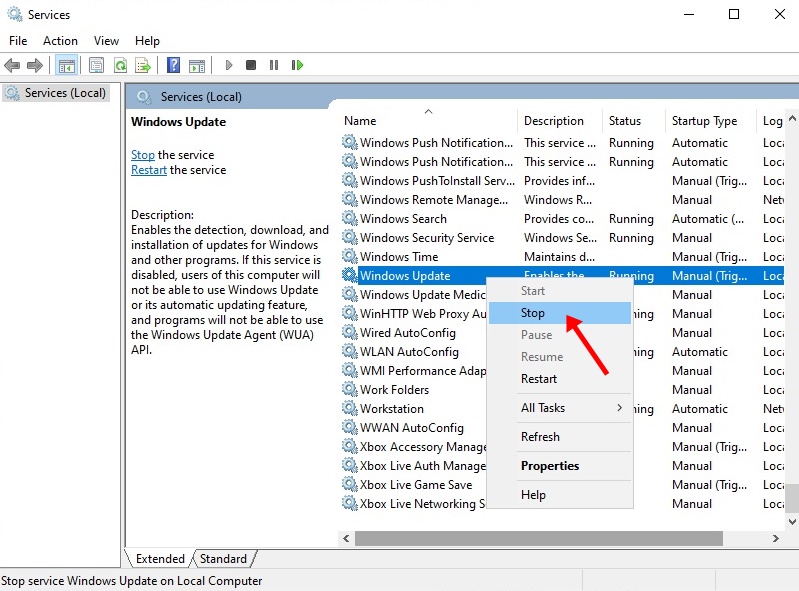
- Now, scroll and navigate to Windows Update service.
- Right-click on Windows Update service and select Stop.
- Now, go to C:\Windows, find the SoftwareDistribution folder, and delete it.
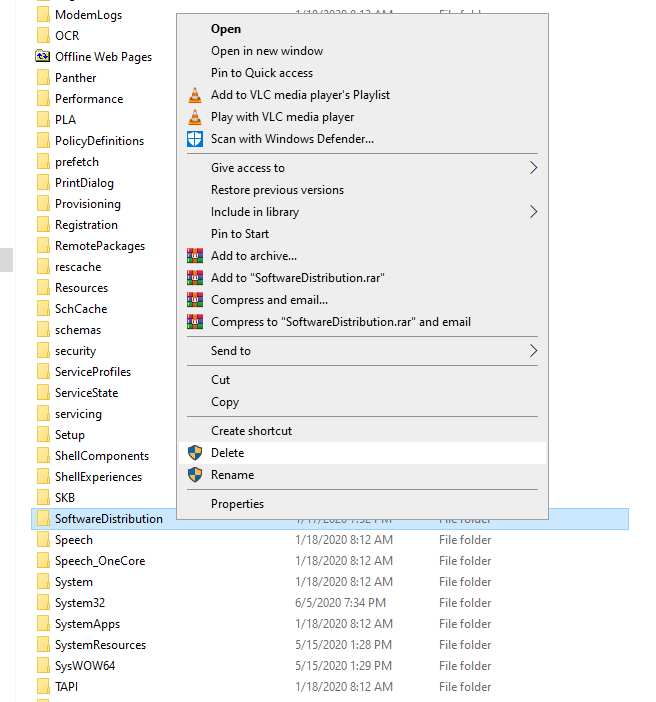
- After deleting, reboot your PC and check for Windows updates.
- If the problem still exists after this then move over to the next step.
Using the Windows Update Troubleshooter tool
- Download the Windows Update Troubleshooter tool from the Microsoft website and run it.
- After running it, choose the Detect problems and apply the fixes for me (Recommended ) option.
- The tool will automatically scan and identify the problem then fix the issues if any exists.
- After troubleshooting is done, check for Windows Update again and see if svchost.exe is using high system resources or not.
